Using Windows DVD Maker, you can customize your DVD menu using their built-in and very professional looking styles. So if you have a bunch of photos and Windows Vista or 7, then let’s create some DVD slideshows that you can then share and watch on your TV.
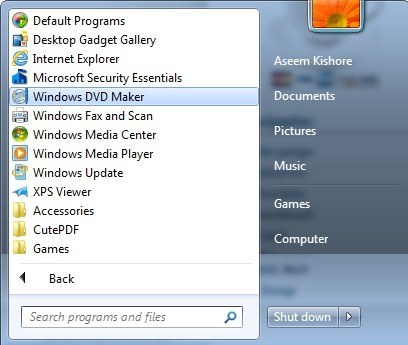
First, go to Start, and then All Programs. Click on Windows DVD Maker or simply type it in the search box.
At the top left, you’ll see the Add items button, which will let you add pictures or videos to your DVD project.
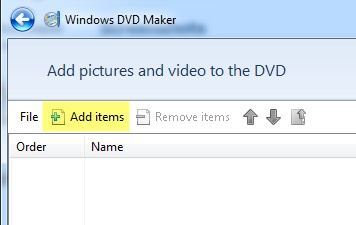
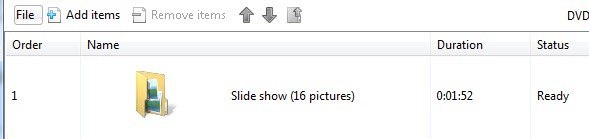
Browse to the location of your picture folder, select all of the photos desired and press Add. You should see a slideshow folder in the list with the number of pictures. If you have more pictures from a different folder, you can add those too and they will be added to the slideshow folder. Here’s what it looks like with a couple of photos.
Go ahead and click Next and now you’ll be able to choose the style of your DVD menu. Here you can customize the Menu text, customize the menu itself, and preview the DVD menu.

Like I mentioned earlier, there are not very many options for configuring your slideshow, but you can do a few small things if you click on the Slide show button at the top (next to Customize menu).
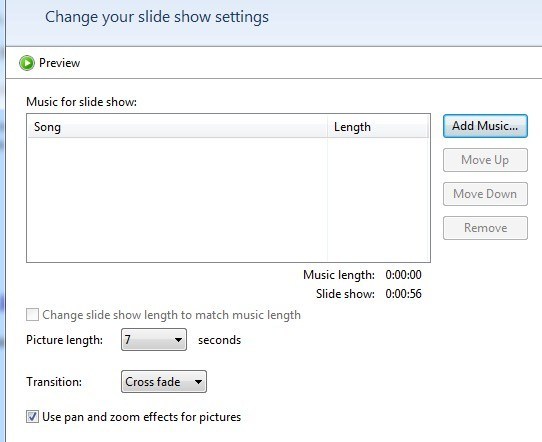
Here you can add music to the slideshow, change the slide show length to match the music length, change the length of time each picture is displayed, change the transition type used for each picture and choose whether to pan and zoom the pictures. It’s basic, but it will get the job done for a lot of people.
Once you have finished customizing the settings, go ahead and click Burn! That’s really all there is to it! The DVD will be burned and you’ll now have your own slideshow on DVD.
Windows DVD Maker will encode the movie in the appropriate DVD format and then it will burn it. The encoding process takes much more time than the burning so you will have to wait a while depending on the speed of your computer.
Source